Tunnel Buying Guide
Module 1: Tips for Tunnel Buying

7:56
Lesson 1: Introduction

8:30
Lesson 2: Caterpillar Tunnel Guide

22:53
Lesson 3: High Tunnel Guide
1:15
Lesson 4: Tunnel Buying Resources
14:13
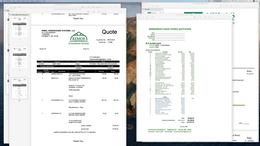
Lesson 5: Bonus: Comparing High Tunnel Quotes

Lesson 6: Bonus: High Tunnel Diagram
Lesson 7: Bonus: Summary of the Course
Lesson 8: Bonus: Quick Guide to the EQIP High Tunnel Initiative